
The most advanced multicam audio synchronization tool for Mac.

Built for the whole shoot, not one take at a time. Point it at the card dumps — every camera, every recorder, every take. Sync matches on audio, corrects clock drift, re‑stamps matching timecode into new copies of the audio files, rebuilds your folders as bins, and opens Premiere Pro or DaVinci Resolve with one button.

PrePost Sync

Drop the whole shoot in. Press Synchronize.

One pass over the whole offload. No merging clips a pair at a time, no multicam source sequences, no XML round trip. Sync matches on the sound itself, so cameras that were never jam-synced and recorders running their own clock all land in the right place.
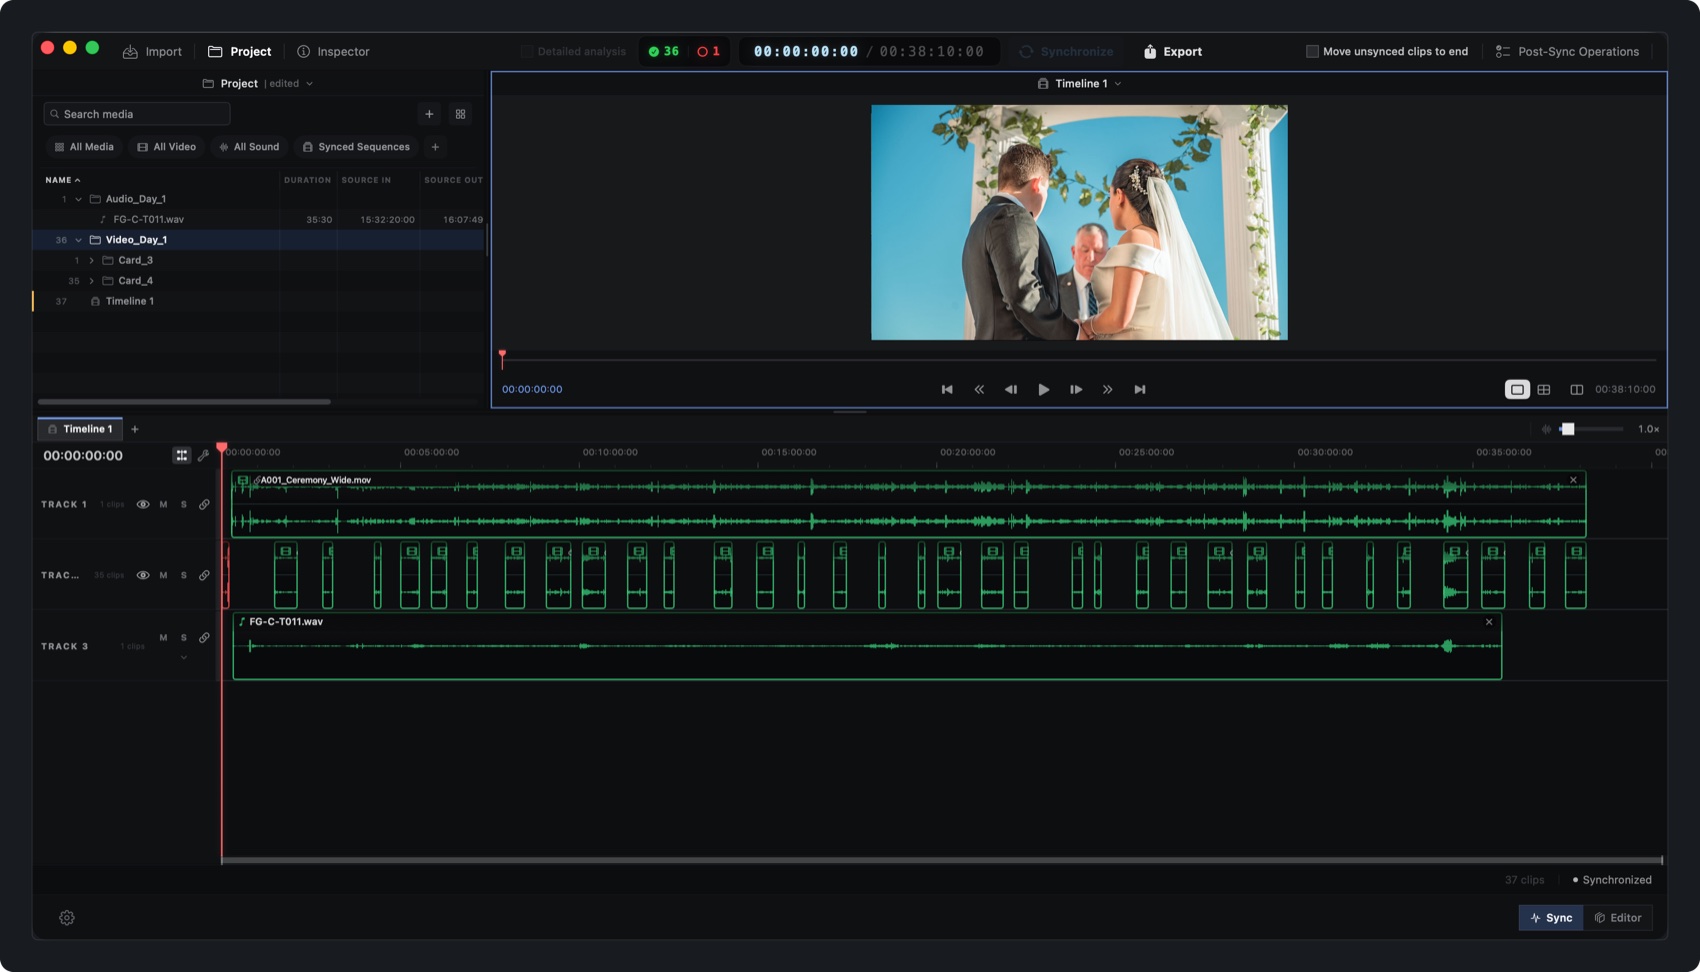

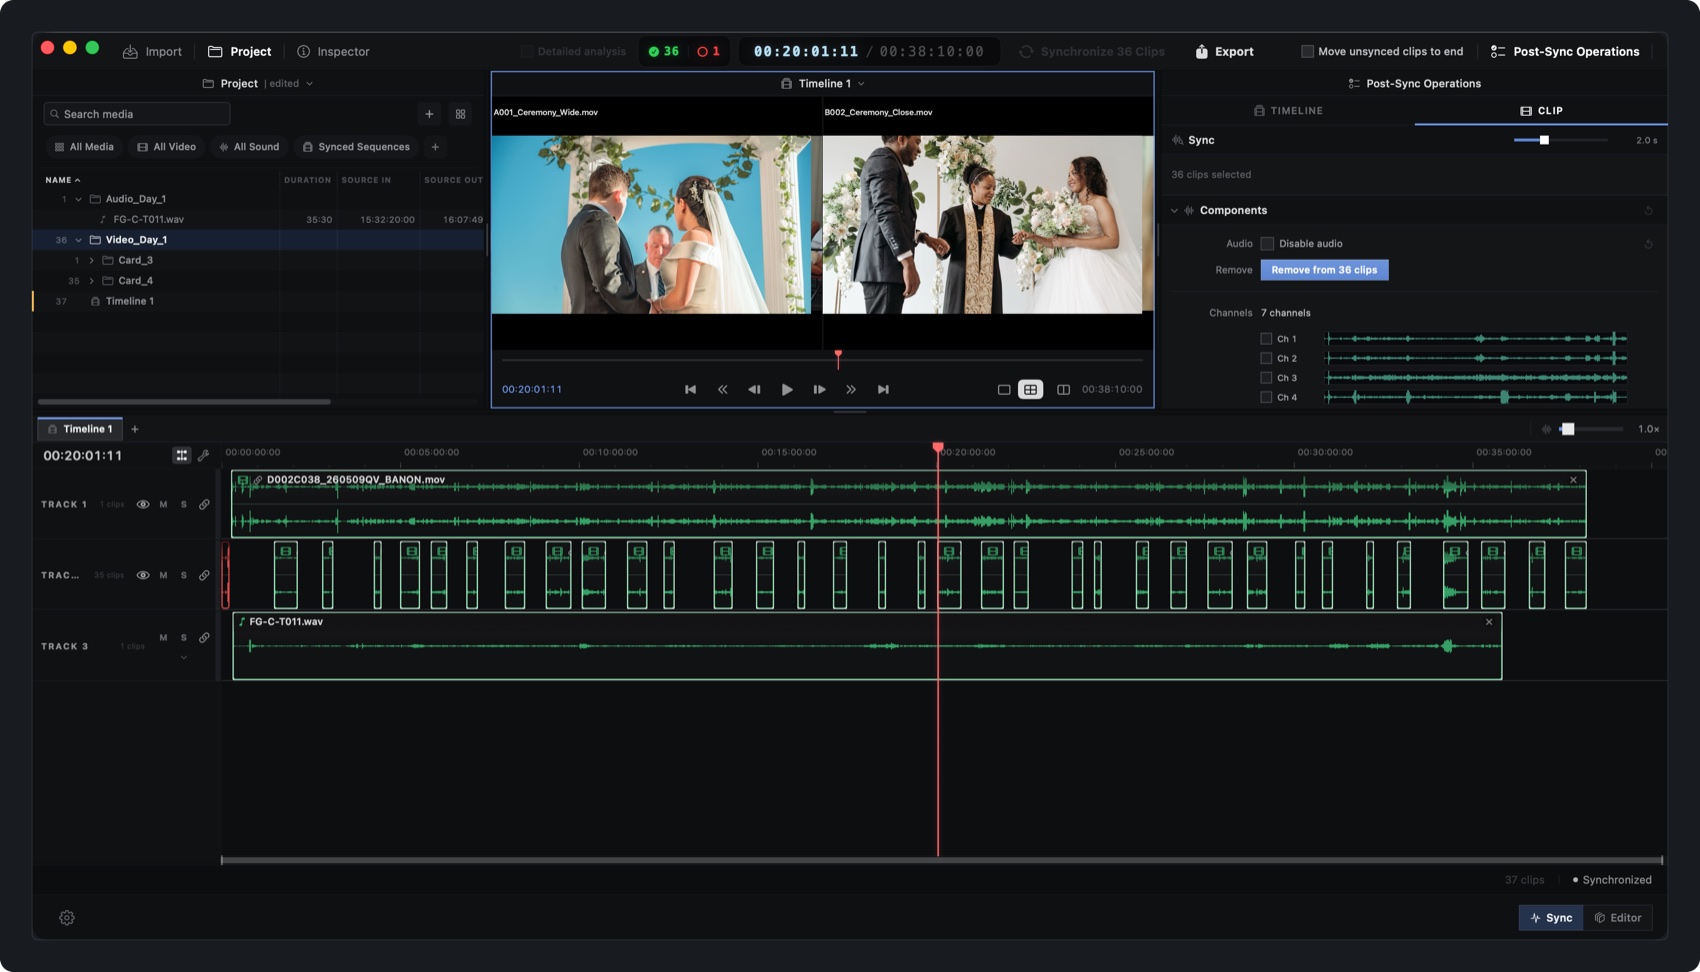
A synced PrePost Sync timeline: three tracks of green synced clips across 38 minutes, with 36 synced and 1 unsynced counted in the header bar

One timeline layout to check the sync. One that looks like your NLE.

Sync view puts every clip at its real offset, so you can see what matched. Editor view lays the same timeline out the way your NLE will — V1, V2, V3 above the divider, audio below. Switching between them is a view change: the offsets never move.

SyncOne row per track, real offsets
Sync timeline: three tracks, each one row, with every clip sitting at its real synced offset
EditorV tracks above, A tracks below
Editor timeline: V2 and V1 video tracks above the divider, A1 to A5 below, with a seven-channel recorder file broken out into per-channel lanes
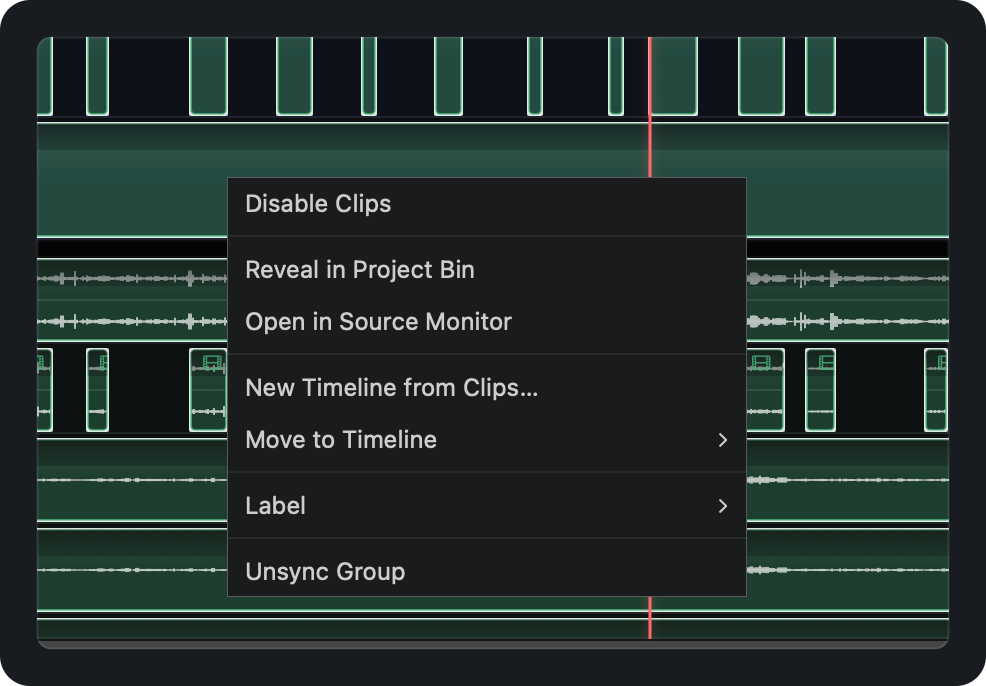
OrganizeOne right-click acts on the whole synced group
Right-click menu over a synced group: Disable Clips, Reveal in Project Bin, Open in Source Monitor, New Timeline from Clips, Move to Timeline, Label and Unsync Group

Hand over a timeline, not a pile of clips.

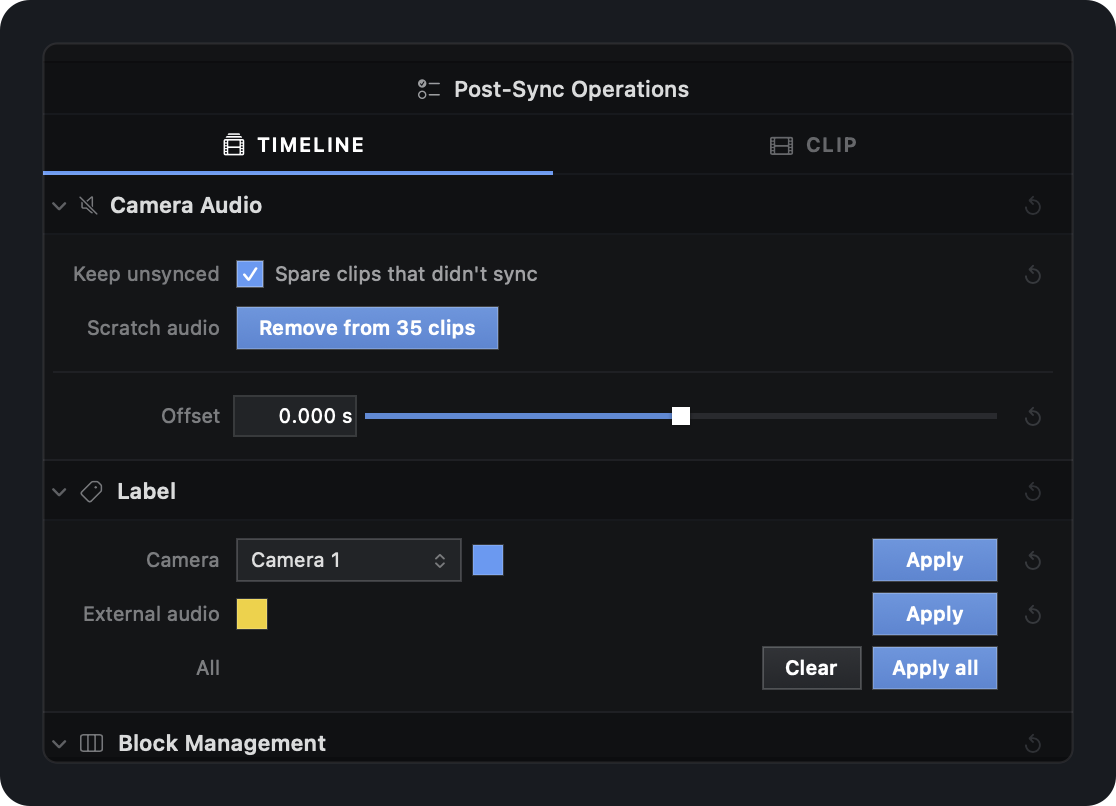
A synced timeline is not yet a timeline you want to hand over. Strip the camera scratch audio now the real sound is under it, label every camera, space the blocks apart, and collect the takes that did not match — in one pane, with a reset arrow on every change.

The Post-Sync Operations pane: Camera Audio with a keep-unsynced tick box, a remove-from-35-clips button and an offset slider, above the Label section

Audio drift correction, right at the head and the tail.

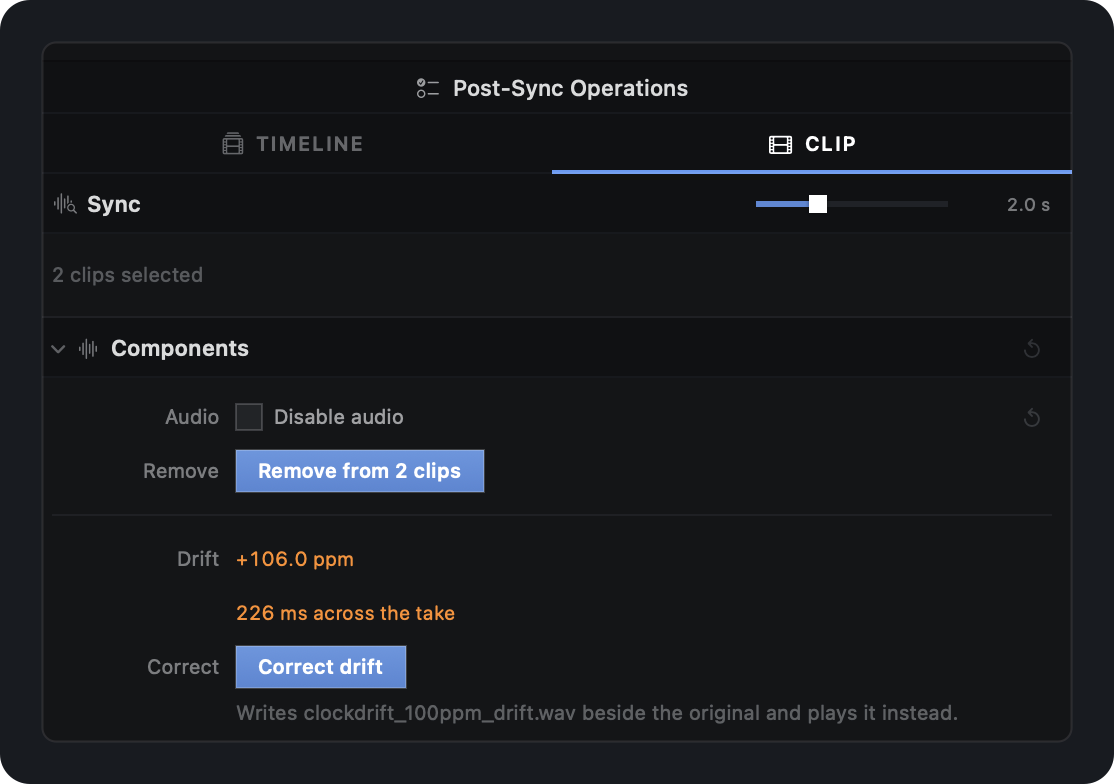
Two devices recording one event rarely share a clock, and the ones that do not diverge steadily: the sync holds at the start of the take and walks away from it by the end. Sync measures that rate error and tells you what it actually costs — in milliseconds, and in frames, across the take.

The CLIP tab reporting Drift +106.0 ppm and 226 ms across the take, with a Correct drift button and a note naming the corrected file it writes

Fine-tune any sync by hand, down to the frame.

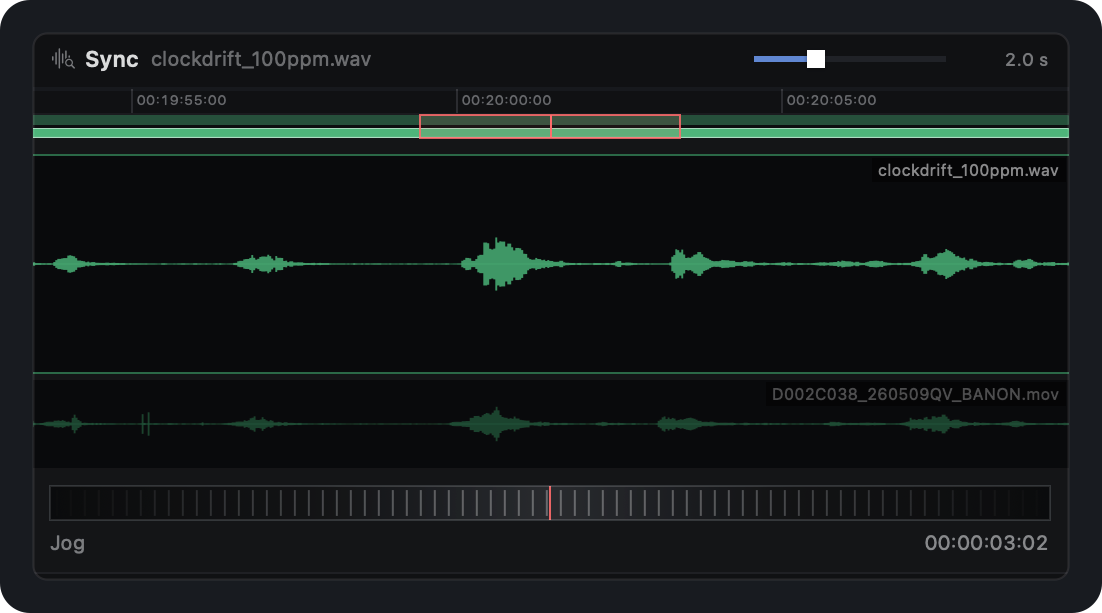
Automatic sync gets it right, but you should never be stuck with a result you cannot adjust. Select any clip and the pane stacks its waveform directly over the camera it matched against, with a jog wheel underneath that slides it while you drag — so you set the offset yourself and watch the peaks line up as you go.

The Sync scope of the CLIP tab: the selected audio waveform stacked over the camera clip it was synced against, with a ridged jog wheel and a position readout beneath

Timecode re-stamping, written into a new copy of the audio.

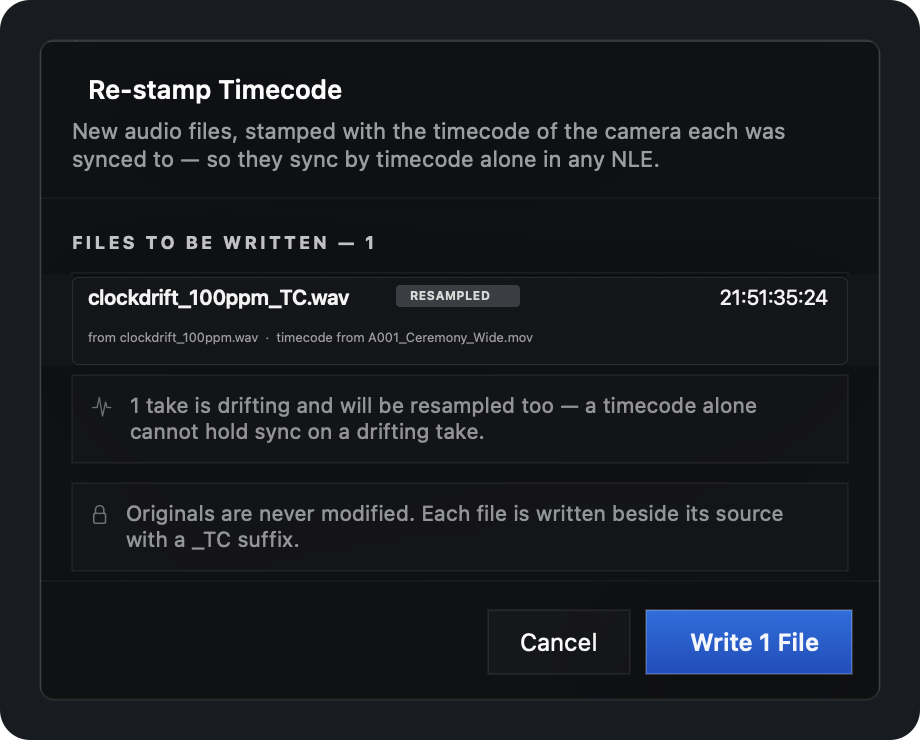
Normally what Sync learns about your audio dies with the project: hand the recorder’s WAVs to an editor and they still carry whatever free-running clock the recorder had that morning. Re-stamp Timecode saves a new copy of the take carrying the matching, synced start timecode on the camera’s clock — so Premiere, Resolve, Avid or Pro Tools place it correctly with no XML and no PrePost Sync.

The Re-stamp Timecode review panel listing clockdrift_100ppm_TC.wav marked RESAMPLED with its target timecode, and the note that originals are never modified

Multi-channel audio, imported correctly.

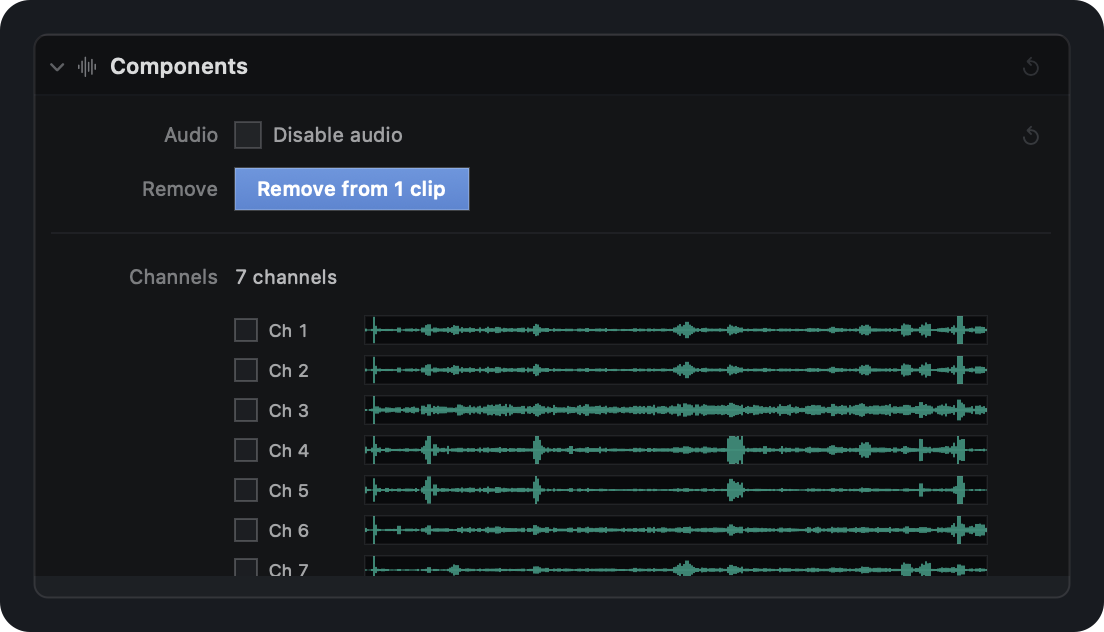
An eight-channel field mix is eight lanes, not a stereo pair. Sync keeps the channels apart, lists them individually, and lets you strike off the ones you do not cut with — the camera-mic channels, usually — before anything reaches your NLE.

The CLIP tab listing a recorder file as seven channels, each with its own waveform and tick box

See what you synced before you leave the app, not an hour later.

Every camera source in one multicam grid, exactly as your NLE would show it. Scrub the timeline and all angles move together, so a take that did not land is obvious in seconds rather than after the round trip.

The multicam grid preview showing two synced camera angles of the same interview sitting on the same frame

Copy in Premiere. Paste in Sync. No plugin.

Premiere already writes its clips to the macOS clipboard. Select them in the project panel or a sequence, copy, and paste straight into Sync — no CEP panel to install.

⌘C

Premiere Pro

⌘V

PrePost Sync

No panel · No extension · No export

Your bin structure, decided before the project opens.

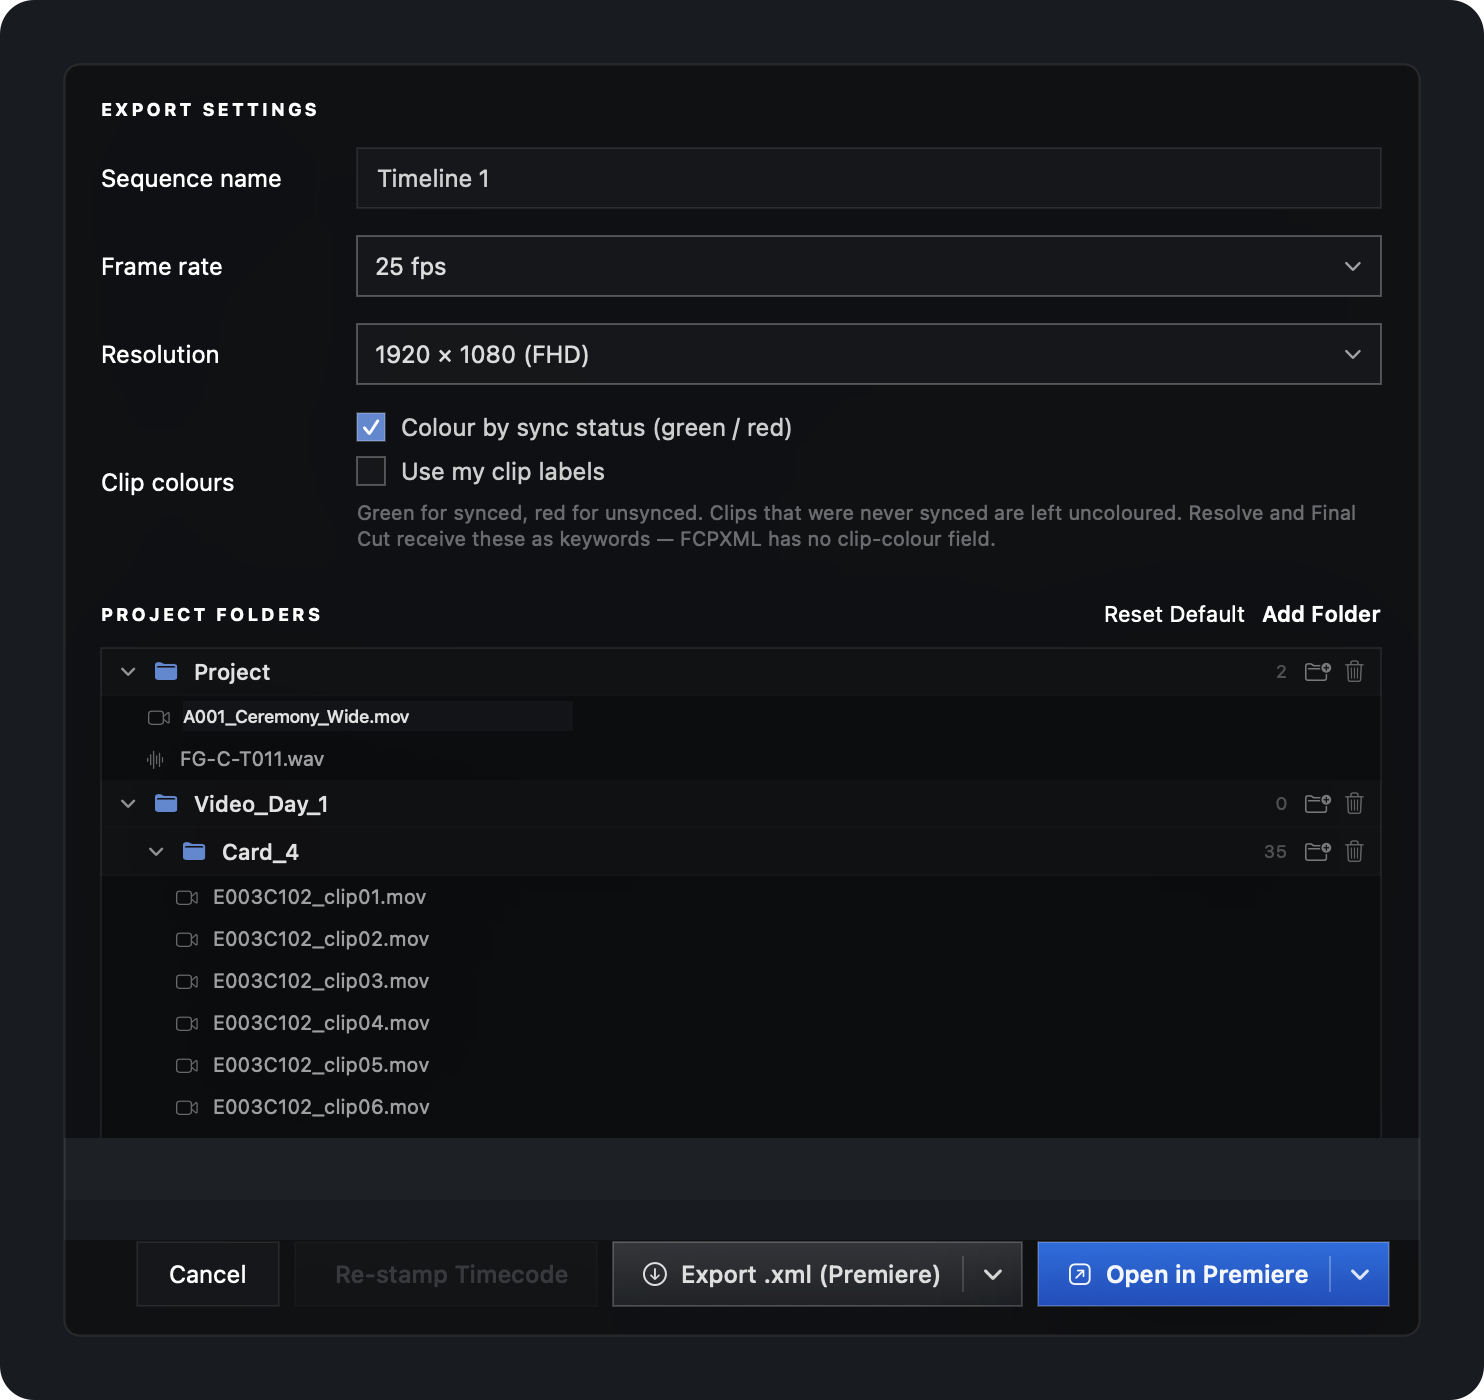
The folder tree your shoot came off the cards in becomes the bin tree your editor opens. Build it in the export sheet — add, rename and nest — instead of rebuilding it by hand on the other side, or dumping everything into one bin and sorting it out later.

The export sheet: sequence settings and clip-colour options above a nested project folder tree, with Export .xml and Open in Premiere below

One button into Premiere Pro. Or into DaVinci Resolve.

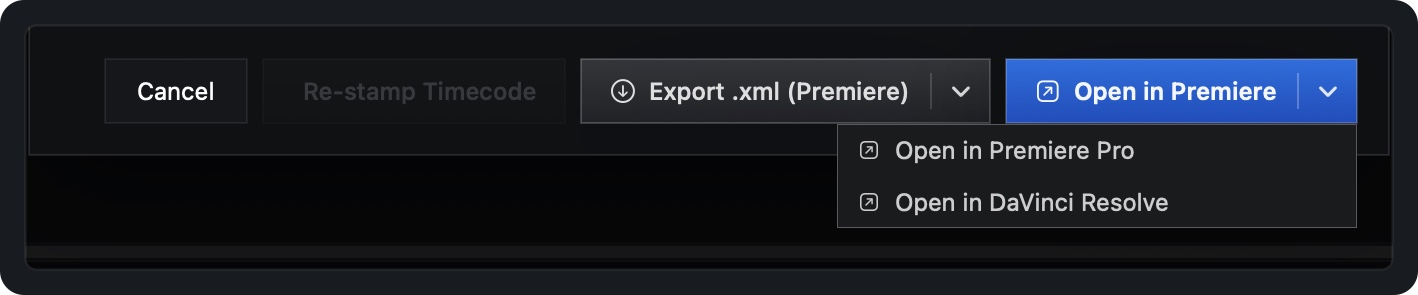
Set the sequence settings once, then press the button — Sync writes the XML, locates the application itself and opens it. Resolve is driven through its scripting API, which is the only route that carries the Media Pool bin tree and your clip colours across.

Open in Premiere Pro

One button. Sync writes the XML, finds Premiere and opens it — no save dialog, no File → Import.

Open in DaVinci Resolve

The same single button, driving Resolve directly — so the Media Pool bins and your clip colours arrive with it.

Export .xml

Prefer to import by hand? Write a standard XML — a Premiere flavour and a Resolve flavour, and Final Cut reads one too.

The Open in Premiere split button expanded to show Open in Premiere Pro and Open in DaVinci Resolve

Four steps, and none of them is an XML round trip.

01

Drop the folder

The whole card dump, or clips pasted from Premiere.

02

Press Synchronize

Cards grouped, tracks placed, audio matched.

03

Check and clean up

QC in the grid. Strip scratch audio, label, space the blocks.

04

Premiere or Resolve

One click. XML written, bins and colours intact.

Pay as you go, or buy for life.

Monthly
$17/month

Flexible access. Cancel anytime.

Lifetime
$199$149one-time

One-time payment. Keep it forever.

Launch price — $50 off the lifetime licence

  • Every feature on this page, no tiers
  • Three-day trial before you pay for it
  • Lifetime licence: every update through the 1.x line
Buy PrePost Sync